2.So, unpack your Joomla download into the htdoc folder
3. Now you can start installing Joomla. Fire up your browser and go to http://localhost/joomla (or whatever you called your site when unpacking it.)

The first screen pretty much speaks for itself. Choose a language and press next.
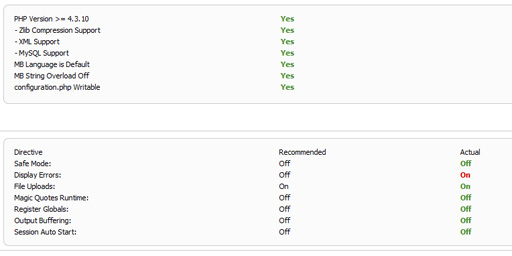
The next screen you see is the Pre-Install checklist. This is a list of the required items and settings Joomla needs to successfully install. Make sure you have the necessary configuration and click next.
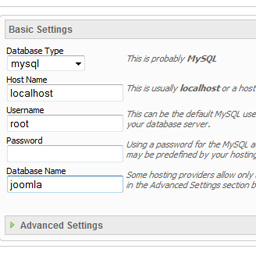
4.On the next page, read the license carefully, and, when ready click next and enter the required details(Host Name: localhost , Username: root , no password and joomla as Database name), and press next.
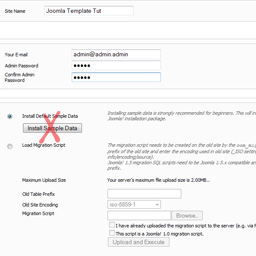
5.Skip the FTP Configuration screen by clicking next and on the next page, enter your site name, an email address and choose a password. This will be the password you will use to log into the admin area of joomla along with the username: admin.
We will not install any sample data right now, as we want to add the modules one by one to see how our template is coming along later on in the tut. Click next.
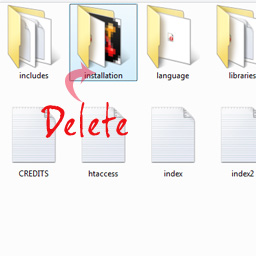
6.Congrats! Joomla is up and running, but before we can go in and mess around we have to delete the installation folder. So go to your www folder inside wamp, and then into the joomla folder and delete the installation folder
7.
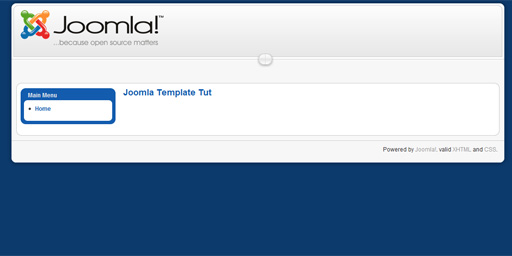
To visit your site , click on preview in the upper right corner of the admin area. What you will get is the default template with no content and the most basic of modules loaded.